In today’s fast-paced digital world, real-time communication has become a crucial aspect of web applications. The ability to send and receive data instantly without any delay is essential for applications such as chat apps, live tracking systems, collaborative tools, and more. Node.js, with its event-driven architecture and non-blocking I/O, is a perfect fit for building real-time applications. And one of the key technologies that enable real-time communication in Node.js is Websockets.
In this article, we will explore the power of Websockets in Node.js and how they revolutionize the way applications communicate. We will delve into the concept of Websockets, their advantages over traditional HTTP communication, and how to implement them efficiently in your Node.js applications. Additionally, we will provide a step-by-step guide and code samples to help you get started with Websockets in Node.js.
Understanding Websockets
What are Websockets?
Websockets are a communication protocol that enables full-duplex, bidirectional communication between a client (typically a web browser) and a server. Unlike traditional HTTP requests, which are unidirectional and stateless, Websockets allow for constant communication between the client and server, enabling real-time data transfer.
How do Websockets work?
Websockets operate by establishing an ongoing connection between the client and the server. This connection is maintained until either the client or the server decides to terminate it. Once the connection is established, both the client and the server can send data to each other at any time without the need for a request from the client.
The WebSocket protocol uses a “classic HTTP mechanism” of handshaking, implemented using request/response headers, to establish the initial connection between the client and the server. After the handshake, the connection remains open, allowing for instant data transmission.
Advantages of Websockets in Node.js
Real-time Communication
One of the major advantages of using Websockets in Node.js is the ability to achieve real-time communication between the client and the server. With Websockets, data can be sent and received instantly, without any delay, allowing for seamless real-time updates in applications.
Full-duplex Communication
Websockets enable full-duplex communication, which means that data can be sent and received simultaneously between the client and the server. This bidirectional communication allows for more interactive and dynamic applications, such as chat applications or collaborative tools.
Reduced Latency
Unlike traditional HTTP requests, which require a new request to be made from the client to the server for every interaction, Websockets maintain a constant connection. This eliminates the need for multiple requests and reduces the latency associated with establishing new connections for each interaction.
Efficient Data Transfer
Websockets offer a more efficient way of transferring data compared to traditional HTTP requests. With Websockets, only the necessary data is sent over the connection, reducing the overhead and improving performance. This efficiency is particularly beneficial for applications that require frequent data updates, such as stock market tickers or real-time analytics dashboards.
Getting Started with Websockets in Node.js
Now that we understand the power and advantages of Websockets, let’s dive into how to get started with Websockets in Node.js. Before we start implementing Websockets, there are a few prerequisites and concepts that we need to be familiar with.

Prerequisites
1 – Node.js Installed
To work with Websockets in Node.js, you need to have Node.js installed on your machine. If you haven’t already installed Node.js, you can download and install it from the official Node.js website (https://nodejs.org).
2 – Basic Knowledge of JavaScript and Node.js
It is essential to have a basic understanding of JavaScript and Node.js concepts before diving into Websockets. Familiarity with concepts such as event-driven programming, asynchronous programming, and callbacks will help you grasp the concepts of Websockets more easily.
Once you have Node.js installed and are comfortable with JavaScript and Node.js, we can start implementing Websockets in our Node.js applications.
Step 1: Setting Up the Project
The first step is to set up a new Node.js project. Open your favorite terminal and create a new directory for your project. Navigate to the project directory and run the following command to initialize a new Node.js project:
npm init -y
This command will create a new package.json file in your project directory, which will keep track of your project’s dependencies and configuration.
To work with Websockets in Node.js, we need a WebSocket library. In this article, we will be using the ws library, a simple and efficient WebSocket implementation for Node.js.
To install the express, ws, socket.io and mongoose library, run the following command in your project directory:
npm install ws express mongoose socket.io --save
npm install nodemon --save-dev
This command will install the ws library and add it as a dependency in your package.json file.
Create a based server.js script, which includes – the initial setup of the Express server, required dependencies, and basic configurations.
const express = require('express');
const bodyParser = require('body-parser');
const app = express();
const http = require('http').Server(app);
const io = require('socket.io')(http);
const mongoose = require('mongoose');
const cors = require('cors');

// Setup the index.html to be served from the main directory
app.use(express.static(__dirname));

// Parse Post Body as JSON
app.use(bodyParser.json());
app.use(bodyParser.urlencoded({extended: false}))

// Cors
app.use(cors({
  origin: '*'
}));
....
// Server Express server on port 3000
var server = http.listen(3000, () => {
  console.log('Server is running on port: ', server.address().port);
  console.log('Website can be accessed on http://localhost:%s', server.address().port)
});
The above code sets up the basic structure of the Express app, includes necessary middleware for parsing requests, enables CORS for cross-origin resource sharing, and initializes Socket.IO for real-time communication. The HTTP listen function starts the Express server on port 3000 and logs a message indicating that the server is running.
Section 2: Data Model and Routes
This section defines the data model for messages and establishes routes for retrieving and adding messages.
// Model message
var Message = mongoose.model('Message',{
  name : String,
  message : String
})

// All messages are stored in a common array
var messages = [];

// Route GET /messages to get all messages
app.get('/messages', (req, res) => {
  Message.find({}, (err, messages) => {
    res.send(messages);
  });
})

// Route POST /messages to add a new message to messages
app.post('/messages', (req, res) => {
  // Check if name or message is blank
  if (req.body.name == '' || req.body.message == '') {
    res.send('Body cannot be blank!', 500);
    return;
  }
  var message = new Message(req.body);
  messages.push(message);

  // Add to MongoDB using .save()
  // ...

  // Broadcast the same message to all users connected
  io.emit('message', req.body);

  // HTTP send response code
  res.sendStatus(200);
})
The above code defines the Message model using Mongoose, creates an array to store messages temporarily and sets up routes for retrieving all messages and adding new messages. It also performs basic validation before adding a new message.
Section 3: Socket.IO Event Listener
This section establishes a Socket.IO connection event listener.
// Socket.IO connection event listener
io.on('connection', () =>{
  console.log('**A new user is connected to your chat!')
})
The above code logs a message whenever a new user connects to the chat through Socket.IO.
Section 4: Socket.IO Library Script
This section includes the inclusion of the Socket.IO library and related dependencies. It initializes a Socket.IO client, establishing a connection to the server. It also sets up an event listener for incoming messages.
<!-- By default, the Socket.IO server exposes a client bundle at /socket.io/socket.io.js. -->
<script src="/socket.io/socket.io.js"></script>

<script>
var socket = io();
socket.on('message', addMessages);
</script>
Section 5: HTML Base Form Using Bootstrap
This section includes the HTML structure for the chat application, incorporating Bootstrap for styling.
<!DOCTYPE html>
<html>
<head>
<!-- Bootstrap and jQuery dependencies -->
</head>
<body>
<div class="container">
<!-- Navigation bar -->
<nav class="navbar navbar-expand-sm navbar-light bg-light">
<!-- Navbar content -->
</nav>
<!-- Main content -->
<div class="jumbotron jumbotron-fluid">
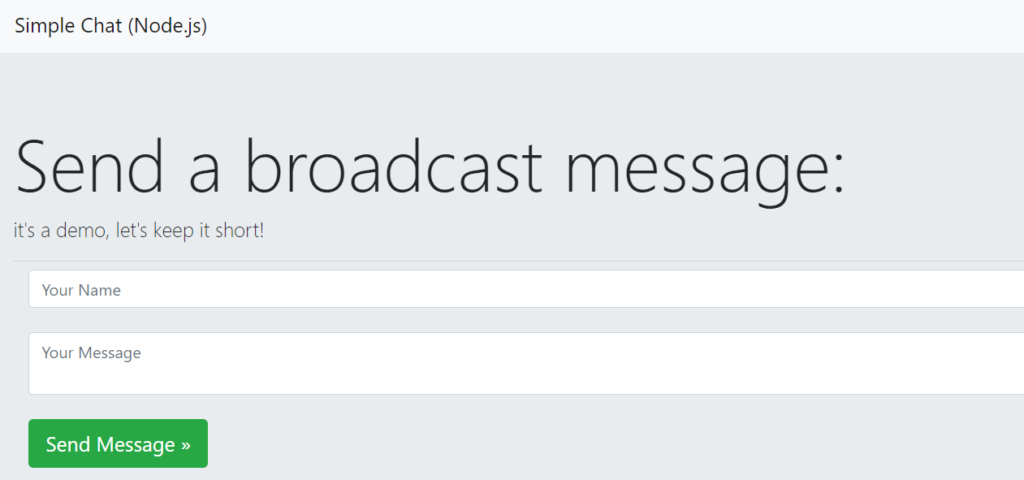
<!-- Form for sending broadcast messages -->
<h1 class="display-3">Send a broadcast message:</h1>
<!-- Form inputs and send button -->
<div class="container">
<!-- Input fields and send button -->
</div>
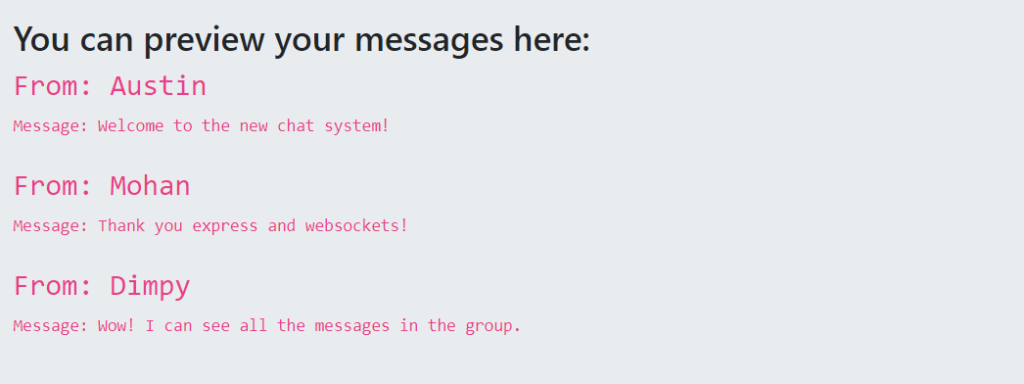
<!-- Message preview section -->
<h3>You can preview your messages here:</h3>
<code>
<div id="messages"></div>
</code>
</div>
</div>
<!-- JavaScript scripts -->
</body>
</html>Section 6: Integrate API for Sending Message
This section handles the integration of the API endpoint for sending messages.
<script>
$(() => {
    // Event listener for send button click
    $("#send").click(() => {
        // Call the sendMessage function
        sendMessage({
            name: $("#name").val(),
            message: $("#message").val()
        });
    });
    // Fetch and display existing messages
    getMessages();
})

// Function to add messages to the preview section
function addMessages(message) {
    $("#messages").append(`
        <h4>From: ${message.name} </h4>
        <p><label>Message</label>:  ${message.message} </p>`);
}

// Function to fetch and display existing messages
function getMessages() {
    $.get('http://localhost:3000/messages', (data) => {
        data.forEach(addMessages);
    });
}

// Function to send a new message
function sendMessage(message, callback) {
    $.post('http://localhost:3000/messages', message, (data, status) => {
        console.log("data, status", data, status);
        // Clear input fields on successful message send
        $("#name, #message").val('');
    }).error((data, status) => {
        // Alert on error
        alert("Error: " + data.responseText);
    });
}
</script>
The event listener for the send button, calls the sendMessage function to send a message. The function getMessages fetches messages from the server and displays them in the preview section.
Step 7: Running the Application
Now that we have implemented both the WebSocket server and client, we can run our application and see the communication in action. Open a terminal window and navigate to your project directory.
Run the following command to start the Express + WebSocket server:
nodemon server.js

// Navigate to http://localhost:3000/
Congratulations! You have successfully implemented a basic WebSocket server and client in Node.js. Open one browser tab and navigate to http://localhost:3000/. Open another browser tab and navigate to http://localhost:3000/. You can now start posting messaged and all the users who have the browser window open will see all the chat messages
Example form showcasing the group chat:
The complete code for this Node.js WebSocket application is available on my GitHub repository: Node.js Express WebSockets
Feel free to download, edit, and have fun experimenting with the code! 🛠️✨
⭐Efficient Use of Websockets in Node.js
While Websockets provide a powerful and efficient way of achieving real-time communication in Node.js, it’s important to use them effectively to optimize performance and scalability.
Here are a few tips for using WebSockets efficiently in your Node.js applications:
1. Use Compression
Websockets support compression, which can significantly reduce the size of the data transferred over the connection. By enabling compression, you can minimize bandwidth usage and improve the overall performance of your application. The ws library in Node.js provides built-in support for compression.
To enable compression in your WebSocket server, simply pass the perMessageDeflate option to the WebSocket.Server constructor:
const wss = new WebSocket.Server({ perMessageDeflate: true });2. Implement Throttling
In applications with a high volume of real-time updates, it’s important to implement throttling mechanisms to prevent overwhelming the server and clients with excessive updates. Throttling ensures that updates are sent at a controlled rate, preventing performance degradation and unnecessary bandwidth consumption.
You can implement throttling by setting a maximum update rate or by using techniques such as debouncing or throttling functions. This ensures that updates are sent at a controlled frequency, avoiding data overload.
3. Secure the Connection
When transmitting sensitive data over Websockets, it’s crucial to secure the connection using encryption. By using the wss protocol instead of ws, you can establish a secure WebSocket connection using SSL/TLS encryption. This ensures that data transmitted over the connection is encrypted and secure from eavesdropping or tampering.
To create a secure WebSocket server, you need to configure your server with an SSL/TLS certificate and use the https module in Node.js. The ws library supports secure WebSocket connections out of the box.
4. Handle Errors Gracefully
Websockets, like any other network communication, can encounter errors. It’s important to handle errors gracefully and provide appropriate error handling and recovery mechanisms in your application. By handling errors properly, you can prevent application crashes and provide a better user experience.
You can listen for the 'error' event on the WebSocket server and client objects to handle any errors that occur during the WebSocket communication. Implement error logging and appropriate error messages to help identify and troubleshoot issues.
5. Implement Authentication and Authorization
If your WebSocket application requires user authentication or authorization, it’s important to implement proper authentication and authorization mechanisms. This ensures that only authorized users can connect to the WebSocket server and access sensitive data or perform specific actions.
You can implement authentication and authorization by validating user credentials, using access tokens, or integrating with existing authentication systems. This adds an extra layer of security and ensures that your WebSocket application is secure and protected.
Next Steps and Learning Resources
Congratulations on learning the basics of Websockets in Node.js! With this knowledge, you can now start building powerful real-time applications that enable seamless communication between clients and servers.
To further enhance your skills in Websockets and Node.js, here are some learning resources that you can explore:
- The Official Node.js Documentation
- WebSocket API Documentation
- Node.js WebSockets Tutorial on MDN
- Socket.IO Documentation
- Real-Time Web Applications with Socket.IO and Node.js on DigitalOcean
- Node.js WebSockets Tutorial on YouTube by The Net Ninja
By exploring these resources and building more WebSocket applications, you will gain a deeper understanding of real-time communication in Node.js and become a proficient developer in this exciting field.
Conclusion
Websockets have revolutionized real-time communication in web applications, enabling seamless and instant data transfer between clients and servers. In this article, we explored the power of Websockets in Node.js and learned how to implement them efficiently.
We discussed the advantages of Websockets over traditional HTTP communication, walked through the step-by-step process of setting up a WebSocket server and client in Node.js, and provided tips for efficient use of Websockets in your applications.
Now that you have a solid foundation in Websockets, it’s time to unleash your creativity and build amazing real-time applications.
Happy coding! 🚀👨💻


